Showing posts with label Bo Bunny Enchanted. Show all posts

Friday, March 16, 2012

All Wrapped Up !

Got a small gift that needs wrapping ?
Then look no further than your scrapbooking stash...
You can really go to town with this idea, and it's perfect for using up all of those odds, ends and half sheets. My sample today uses some of the Bo Bunny Enchanted Collection that we have been showcasing over the month of February.


Supplies can be ordered from the Scraploot Online store.
Materials:

BB Enchanted Glitter Paper - Enchanted
SUL Guipure Lace White
BE Symphony Flowers - Pink
Black Lace
XP Double Sided Tape
XP Clear Gel Glue
Other: Dymo Label, Punch, Tag

Until next time - Happy Scrapping

Monday, March 12, 2012

Treasured Memories....

Welcome to my last page featuring this beautiful Bo Bunny range. For my last feature, I bring you a touch of green.

I have used a varying mix of shapes and templates on this page to change it up. The lovely black and white photo I have used is a favourite of mine from our friends’ wedding last year. We had such a lovely weekend up at Jonah’s relacing and celebrating with them. They are truly beautiful friends. We were fortunate to travel together earlier last year and had so much fun!


To recreate this page, stock up on the following at the Scraploot online store.
Enjoy the rest of your week and stay tuned for more design team goodness throughout the week!

Happy scrapping!

Xx Renae

Friday, March 09, 2012

Beautiful Crystal...

Hi Everyone !
Hope you have some wonderful plans for the weekend.
I'll be attending my BIL's wedding in Forster - should be great !
Here's a quick layout you can whip up during your Friday night scrapping using the fabulous Bo Bunny Enchanted collection:


Visit the Scraploot store for all the supplies:

BB Enchanted Glitter Paper - Evening
BB Enchanted Follow Your Heart Cardstock Stickers
BB Enchanted Brads
SUL Guipure Lace - White
AC Glitter Rockabye Thickers - Black
PR Flowers - Gillian White
BE Flowers - Pink Symphony
2Crafty Chipboard - Liza's Banner
Other: Black Lace, Prima Packaging

Until next time, Happy Scrapping!

Monday, March 05, 2012

Always and Forever

Welcome to a new week! I hope you are surviving in this crazy weather. With the weekend rain, it was a great opportunity for you to get some scrapping time in.

This week I bring you another page from the gorgeous Bo Bunny Enchanted range. Make sure you head over to the Scraploot online store to pick up your goodies before you make a start on these instructions. 

My beautiful photo subjects are long time close family friends and my brother’s best friend, at their wedding early last year. They were married just before we left on our overseas trip, so we were so glad we could make it. It was a very emotional and special day, it was like watching my little brother get married all over again. They also just gave birth to a gorgeous little girl that I have yet to visit, but from all the pics I have seen, she is just adorable and no doubt will be a subject of many of my layouts down the track!

So to get you started, pick up the following supplies:

And now let’s get started with putting this together. It’s all about layering and using those left over pieces of paper.

Let’s get started with the paper and cardstock.
1.     Start off using your Wine coloured cardstock as your base and ink the edges. You can also create a mat for your photo at the same time. If you don’t want to get fussy with trying to cut it out of the middle of your cardstock, then grab yourself an extra piece of cardstock. 
TIP: To make my layouts slide into my album easier, I cut my cardstock down to 30cm x 30cm before I start. Then my bulkier pages don’t take forever to try to squeeze in and I don’t get frustrated trying! 
2.     Taking your “Fairytales” paper, cut 2 pieces measuring 5cm wide x 8cm high. Distress and ink. Place the first piece 8.5cm from the left hand side of your cardstock and 0.5cm from the top. Place your second piece 7cm from the right hand side of your cardstock and 0.2cm from the bottom.
3.     Taking your “Dots” paper, cut 2 pieces measuring 6cm wide x 5cm high. Distress and ink. Place the first piece 5cm from the left hand side of your cardstock and 3cm from the top. Place your second piece 4cm from the right hand side of your cardstock and 1.5cm from the bottom.
4.     Taking your “Romance” paper, cut 2 pieces measuring 5cm wide x 5cm high. Distress and ink. Place the first piece 3cm from the left hand side of your cardstock and 6.5cm from the top. Place your second piece 3cm from the right hand side of your cardstock and 3cm from the bottom.
5.     Taking your “Rose” paper, cut a piece 22cm wide x 19cm high. Distress and ink. Place directly in the middle of your cardstock.
6.     Place Magic Mount to the back of your photo mat with your photo and place tis directly in the middle of your page.

Now let’s get embellishing!

1.     From the sheet of chipboard shapes, take the flourish and place this at the top left hand cluster of layered paper.
 2.   Take your chipboard Fleur de Lis and ink. Adhere this to the bottom right hand corner of your large piece of paper. Once it is adhered, finish with a coat of Glossy Accents.
TIP: Unless you leave it to dry for a few hours first, it’s always easier to add any wet products like Glossy Accents, after the item is stuck to the page.
3.     From the sticker sheet, take 3 different sized square shaped tiles. Add Magic Mount to the back of them and then stagger them from the bottom right hand corner of your page.
4.     From the sticker sheet, use the “Always & Forever" sticker. Add Magic Mount and adhere to the top right hand corner of your large piece of paper. 
5.     Next up, your flower cluster… this will all go to the bottom left hand edge of your photo.
-        Using one of the White Prima flowers, place this on the bottom left hand corner of your photo.
-        Using a square brad, place this diagonally under it.
-        The take another White Prima flower and place this diagonally next to the brad.
-        Then start layering with the Prima paper flowers. Using 3 patterned pink flowers, scatter them around the bundle you have created. You will create almost a circle with the flower cluster. The larger of the pink flowers has a black one just peeking out from behind it.
-        Then add a Scraploot trinket pin sticking out the top of the cluster and a sticker tag from the sticker sheet with a little bit of journaling.
-        To finish it off, take some Kaisercraft pearls and scatter them around the flower cluster. I have put a few on their own and then a cluster of 3 tiny ones here and there.
Thank you for joining me this week. I hope you have enjoyed putting this together. Stay tuned for more exciting designs from the Design Team and don’t forget to check out all the new goodies and pre orders on the online store.

Happy scrapping!

xx Renae

Friday, March 02, 2012

10.03.12 Insert Photo Here

Happy Friday everyone !
Something a little different from me today...
A layout that it is a gift for my BIL and his new wife (well she will be next Saturday) !
Felt a bit surreal making a page without a picture and using a date yet to come !
But the Bo Bunny Enchanted Collection was the perfect range to use.


Congratulations Rex & Jess...hope you have a long and happy marriage !
To make this gift layout, grab the following from the Scraploot Store:

BB Enchanted Glitter Paper - Glitter Cutouts; Love
BB Enchanted Brads
BB Enchanted Layered Chipboard
BB Enchanted Trinkets
BB Enchanted Follow Your Heart Cardstock Stickers
ASS Textured Cardstock - Black
GT Flowers - Apple Blossom Red
AC Thickers - Rockabye Glitter
Scraploot Vintage Trinket Pin
SUL Guipure Lace - White
2Crafty Chipboard - Damask
Other: Dymo Label; Plain Paper

Until next week, Happy Scrapping !

Monday, February 27, 2012

Happily Ever After...

This week I bring you a very white focussed page with a mix of black and a tiny touch of orange/beige to make the page pop.

The Enchanted range from Bo Bunny is gorgeous and gives you something different to work with every time you look at it. I chose some rounded edged stickers for this one and continued the theme through with my paper and cardstock. Then to make it stand out, I left the photo mat and photo with the sharp edges.


Feel like giving this page a try yourself? Then head over to the Scraploot online store and pick yourself up the following:

I hope you have been enjoying the Bo Bunny range that we have been showcasing for you. Keep an eye out next week for my step by step instructions page… until then, stay inspired with the rest of the creations from the Design Team.

Don’t forget you still have a few more days to submit your entry for the February sketch challenge competition. We’d love to see your creations.

Happy scrapping!

xx Renae

Monday, February 20, 2012

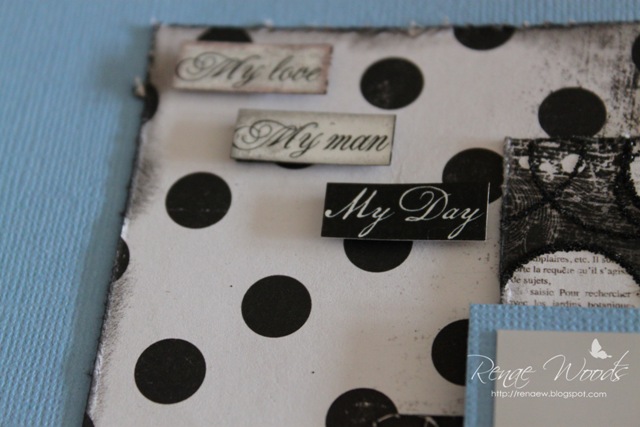
Wedding inspiration... something blue...

With all the weddings we went to last year, we have plenty of photos and the wedding ones work so well with this gorgeous Bo Bunny Enchanted range, so I wasn’t short of photographic inspiration!
This week I bring you a page with a blue twist….. try using a different colour as your base for the layout and incorporate the black and white elements into it.
 
For this layout, I have used the patterned paper and added additional elements with the chipboard shapes and stickers and given them a lift by using magic mount of the back of them. It just helps to add that extra dimension.

Check out the following items over at Scraploot to get you started.
XP 6mm Double Sided Tape
American Crafts Memory Marker Ash
Inkssentials Glossy Accents
Tiny shipping tag
As you can see from the close ups, I have also used some Glossy Accents on one of the stickers to highlight it.


A few little things as simple as adding some Glossy Accents and Magic Mount, can create a lift to your page and add dimension.

Enjoy your week and I hope you have some time to relax and scrap.
Happy Scrapping!
xx Renae

Monday, February 13, 2012

Be Enchanted with Bo Bunny...

Welcome to a new week and a new range to share with you…. I welcome you to the Bo Bunny Enchanted range that we will be sharing with you over the next few weeks.

This range is a gorgeous blend of black and white and as you can see here, I’ve broken it up with a touch of pink.
 
What do I need to recreate this page you ask? Well head over to the Scraploot online store and pick up the following supplies. While you are there, don’t forget about the awesome pre order discounts currently up for grabs.


There are a few close ups for you as well, showing the finer details….


Don’t forget your entries in for the monthly challenge too…. Rach has designed a beautiful sketch for you to use and we can’t wait to see what you have to share with everyone.

Enjoy your week and happy scrapping!

xx Renae

Saturday, November 26, 2011

Drum Roll……

We are excited to announce and introduce you to our new Scraploot Design Team.
To celebrate this announcement of our new Scraploot Design Team, we are celebrating with a blog hop (all details at the end of the post), so that you can pop over to each of the girls blog and check them out... So without further ado, announcing;
Renae Woods
Renae Woods-1
Hi I'm Renae. I've been scrapping now for around 5 years. I live in Sydney with my gorgeous husband of almost 12 years, who features on many of my pages. I now also have a beautiful new nephew who is starting to creep into many of my pages! Fortunately family and friends know what an avid scrapper I am and how much I love my camera!
My camera is usually permanently attached to me at gatherings now so I can capture every moment!
I'm fortunate to have an amazingly creative outlet in scrapbooking and am just as fortunate to work in one of the beautiful parts of Sydney at Darling Harbour, where I am surrounded by the water and animals on a daily basis! After a crazy day at work, I love being able to retreat to my scrap area and create.
My scrapping style has changed over the years and I seem to have now settled on a blend of modern shabby chic. My work usually features plenty of distressing, inking and layering, not to mention flowers. I love my flowers!
I love scrapbooking and the wonderful friends I have met during my creative journey and I can't wait to meet plenty more!
Ruby Bisson
Ruby Bisson-1
My name is Ruby Bisson and I am 17 years old and reside in sunny Sydney. I have been scrapbooking and lurking online chat rooms and challenge blogs since I was 13 and have been hooked on the craft ever since! I have just finished high school and am looking into becoming an English teacher in the future. I have an art studio on my driveway- a little caravan draped with material and lanterns, complete with electricity for the hot days. I have a messy, colourful style- and believe that honestly- you can never have TOO much paint or colour. ;)
Michelle Winston
Michelle Winston-1
I am 38 years old, married to Brett, with two gorgeous sons - Jacob 11yrs and Caden 3 yrs. We live on Sydney's beautiful Northern Beaches, and when I'm not scrapbooking, I am a primary school teacher !
I have been scrapbooking for a number of years now, and I still love it ! I think I like shopping for new goodies most of all LOL ! I have been fortunate to work for a variety of challenge blogs, websites, stores and manufacturers, and I have been lucky enough to have my work published as well. I was named a Scrapbooking Memories Master for 2010, and have really enjoyed my "masters" year, this year.
I am very happy to be on the Scraploot DT, and can't wait to share lots of scrapping, tutorials and inspiration with you !
And of course you know us:
Rachael
Rach M4M-3
Sue
Sue-1
We would like to welcome Renae, Ruby and Michelle to the Scraploot Design Team. We are very excited to have them on board and can’t wait for these girls to start inspiring us week after week. We are sure you are going to love seeing what they come up with.
With the new Design Team, you are going to find lots of inspiration popping up on the blog each week, with regular posts from each of the girls, store updates, along with regular step by step layouts or techniques.
Behind the scenes, here at Scraploot we are planning lots of FUN things, along with some great challenges.
So enough chattering… Here is a project created by Sue, using the latest collection from Bo Bunny – Enchanted.
SCRAPLOOT 261111 Sue
Materials Used
-Cut Outs – Rose – Enchanted
 
To be a part of our blog hop and be in the running for some RAK, just drop by each of the DT blogs. When visiting each of the Design Teams blogs, look out for a letter within their post, in the colour RED. Once you have hopped by the four blogs and left some love on each, after collecting each of the RED letters, send an email to info@scraploot.com.au with the magic word, and your name, to be in the running for some goodies. All entries are to be received by Thursday, 1st December 2011 at 5pm.
Thanks for hopping by - now please hop on over to Renae’s blog, to get to know her a little better.
Just in case you get lost, here are the links in order for the Hop;
Renae
Ruby
Michelle
Rachael