Monday, March 05, 2012

Always and Forever

Welcome to a new week! I hope you are surviving in this crazy weather. With the weekend rain, it was a great opportunity for you to get some scrapping time in.

This week I bring you another page from the gorgeous Bo Bunny Enchanted range. Make sure you head over to the Scraploot online store to pick up your goodies before you make a start on these instructions. 

My beautiful photo subjects are long time close family friends and my brother’s best friend, at their wedding early last year. They were married just before we left on our overseas trip, so we were so glad we could make it. It was a very emotional and special day, it was like watching my little brother get married all over again. They also just gave birth to a gorgeous little girl that I have yet to visit, but from all the pics I have seen, she is just adorable and no doubt will be a subject of many of my layouts down the track!

So to get you started, pick up the following supplies:

And now let’s get started with putting this together. It’s all about layering and using those left over pieces of paper.

Let’s get started with the paper and cardstock.
1.     Start off using your Wine coloured cardstock as your base and ink the edges. You can also create a mat for your photo at the same time. If you don’t want to get fussy with trying to cut it out of the middle of your cardstock, then grab yourself an extra piece of cardstock. 
TIP: To make my layouts slide into my album easier, I cut my cardstock down to 30cm x 30cm before I start. Then my bulkier pages don’t take forever to try to squeeze in and I don’t get frustrated trying! 
2.     Taking your “Fairytales” paper, cut 2 pieces measuring 5cm wide x 8cm high. Distress and ink. Place the first piece 8.5cm from the left hand side of your cardstock and 0.5cm from the top. Place your second piece 7cm from the right hand side of your cardstock and 0.2cm from the bottom.
3.     Taking your “Dots” paper, cut 2 pieces measuring 6cm wide x 5cm high. Distress and ink. Place the first piece 5cm from the left hand side of your cardstock and 3cm from the top. Place your second piece 4cm from the right hand side of your cardstock and 1.5cm from the bottom.
4.     Taking your “Romance” paper, cut 2 pieces measuring 5cm wide x 5cm high. Distress and ink. Place the first piece 3cm from the left hand side of your cardstock and 6.5cm from the top. Place your second piece 3cm from the right hand side of your cardstock and 3cm from the bottom.
5.     Taking your “Rose” paper, cut a piece 22cm wide x 19cm high. Distress and ink. Place directly in the middle of your cardstock.
6.     Place Magic Mount to the back of your photo mat with your photo and place tis directly in the middle of your page.

Now let’s get embellishing!

1.     From the sheet of chipboard shapes, take the flourish and place this at the top left hand cluster of layered paper.
 2.   Take your chipboard Fleur de Lis and ink. Adhere this to the bottom right hand corner of your large piece of paper. Once it is adhered, finish with a coat of Glossy Accents.
TIP: Unless you leave it to dry for a few hours first, it’s always easier to add any wet products like Glossy Accents, after the item is stuck to the page.
3.     From the sticker sheet, take 3 different sized square shaped tiles. Add Magic Mount to the back of them and then stagger them from the bottom right hand corner of your page.
4.     From the sticker sheet, use the “Always & Forever" sticker. Add Magic Mount and adhere to the top right hand corner of your large piece of paper. 
5.     Next up, your flower cluster… this will all go to the bottom left hand edge of your photo.
-        Using one of the White Prima flowers, place this on the bottom left hand corner of your photo.
-        Using a square brad, place this diagonally under it.
-        The take another White Prima flower and place this diagonally next to the brad.
-        Then start layering with the Prima paper flowers. Using 3 patterned pink flowers, scatter them around the bundle you have created. You will create almost a circle with the flower cluster. The larger of the pink flowers has a black one just peeking out from behind it.
-        Then add a Scraploot trinket pin sticking out the top of the cluster and a sticker tag from the sticker sheet with a little bit of journaling.
-        To finish it off, take some Kaisercraft pearls and scatter them around the flower cluster. I have put a few on their own and then a cluster of 3 tiny ones here and there.
Thank you for joining me this week. I hope you have enjoyed putting this together. Stay tuned for more exciting designs from the Design Team and don’t forget to check out all the new goodies and pre orders on the online store.

Happy scrapping!

xx Renae

Friday, March 02, 2012

10.03.12 Insert Photo Here

Happy Friday everyone !
Something a little different from me today...
A layout that it is a gift for my BIL and his new wife (well she will be next Saturday) !
Felt a bit surreal making a page without a picture and using a date yet to come !
But the Bo Bunny Enchanted Collection was the perfect range to use.


Congratulations Rex & Jess...hope you have a long and happy marriage !
To make this gift layout, grab the following from the Scraploot Store:

BB Enchanted Glitter Paper - Glitter Cutouts; Love
BB Enchanted Brads
BB Enchanted Layered Chipboard
BB Enchanted Trinkets
BB Enchanted Follow Your Heart Cardstock Stickers
ASS Textured Cardstock - Black
GT Flowers - Apple Blossom Red
AC Thickers - Rockabye Glitter
Scraploot Vintage Trinket Pin
SUL Guipure Lace - White
2Crafty Chipboard - Damask
Other: Dymo Label; Plain Paper

Until next week, Happy Scrapping !

Monday, February 27, 2012

Happily Ever After...

This week I bring you a very white focussed page with a mix of black and a tiny touch of orange/beige to make the page pop.

The Enchanted range from Bo Bunny is gorgeous and gives you something different to work with every time you look at it. I chose some rounded edged stickers for this one and continued the theme through with my paper and cardstock. Then to make it stand out, I left the photo mat and photo with the sharp edges.


Feel like giving this page a try yourself? Then head over to the Scraploot online store and pick yourself up the following:

I hope you have been enjoying the Bo Bunny range that we have been showcasing for you. Keep an eye out next week for my step by step instructions page… until then, stay inspired with the rest of the creations from the Design Team.

Don’t forget you still have a few more days to submit your entry for the February sketch challenge competition. We’d love to see your creations.

Happy scrapping!

xx Renae

Friday, February 24, 2012

Only a few days...

...left to get your sketch challenge entry in for February !
Here is my interpretation of the sketch, using the gorgeous Bo Bunny Enchanted Range, and some lovely bits and bobs from Scraploot:


A close up of the title using some fab glittery thickers !


A classic vintage pin and some brilliant brads helped to jazz up this cluster of embellishments!

You have until 11:59pm on Wednesday 29 February to get your entry in.
Don't miss out on giving this great sketch a go, and perhaps winning yourself a prize!
Materials for this layout from the Scraploot Store are:

Other: Ink, Dymo Labels, 2Crafty Tattered Heart

Wednesday, February 22, 2012

Mini Masterchef

This week from Sue & myself (Rach) we are going to be mixing it up a little and giving you some great boy inspiration... today I'm going to be showing a layout called Masterchef, and uses the Echo Park Apothecary Emporium Collection. This collection is really versatile, as you will see from my posts this week.
Materials Used
Jenni Bowlin Tickets
Purple Pumpkin Doily & Button

Also don't forget you still have till the 29th February to get your Sketch Competition entries, we have some great ones so far this month, be sure to keep a check on Facebook and here for the entries later on in the week. Here is the sketch again, in case you missed it.

Email your entries to info@scraploot.com.au or upload them to our Facebook page.

Rach xo

Monday, February 20, 2012

Wedding inspiration... something blue...

With all the weddings we went to last year, we have plenty of photos and the wedding ones work so well with this gorgeous Bo Bunny Enchanted range, so I wasn’t short of photographic inspiration!
This week I bring you a page with a blue twist….. try using a different colour as your base for the layout and incorporate the black and white elements into it.
 
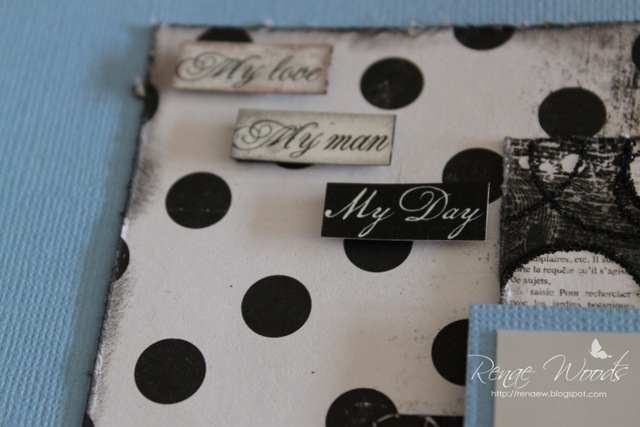
For this layout, I have used the patterned paper and added additional elements with the chipboard shapes and stickers and given them a lift by using magic mount of the back of them. It just helps to add that extra dimension.

Check out the following items over at Scraploot to get you started.
XP 6mm Double Sided Tape
American Crafts Memory Marker Ash
Inkssentials Glossy Accents
Tiny shipping tag
As you can see from the close ups, I have also used some Glossy Accents on one of the stickers to highlight it.


A few little things as simple as adding some Glossy Accents and Magic Mount, can create a lift to your page and add dimension.

Enjoy your week and I hope you have some time to relax and scrap.
Happy Scrapping!
xx Renae

Friday, February 17, 2012

Enchanting Bo Bunny !

An off the page from me this week...
A notebook using the gorgeous Bo Bunny Enchanted collection !
A simple, yet beautiful project for the weekend.


A few detail shots: Glittery American Craft Thickers; awesome Bo Bunny Layered Chipboard; vintage Scraploot Trinket Pin and a sensational Bella Blossom !


You can find the supplies for this project at Scraploot Online Store.
Notebooks can be any size with a hard cover.
Please note that I used some cardstock under my pattern paper, as my notebook had an uneven front cover.

You will need:


Have a great weekend !
Happy Scrapping !

Thursday, February 16, 2012

You & I - Lily Bee Head Over Heels Step by Step

A late post tonight, as I've been unwelll for a couple of days, but want to share this cute little layout with you, using the Lily Bee Head Over Heels collection, along with the We R Memory Keepers Sew Easy tool.
 The We R Memory Keepers Sew Easy has been on the market for a little while now, and WRMK have just kept on bringing out different interchangeable heads for this tool making it really versatile. For today's project however, I decided to use just the original head that comes with the main tool. The WRMK Sew Easy also comes with a needle, which has its own nifty hiding hole, in the handle, so you never have to search for another needle. You can see it in the picture below.

 To create the base of my layout, I used my Marvy Scalloped Circle punch, and randomly punched some circles from my Lily Head Over Heels patterned papers. I adhered these scalloped circles in a 3x3 Grid.
 Using the Sew Easy Mat, I layed my layout onto it and used the grid lines on the mat to guide where I would roll my sew easy tool. I can't believe how quick and easy the Sew Easy Tool made piercing the holes ready to be handstitched. I just rolled the tool along my cardstock with only a small amount of pressure.
 The picture below, shows how well the Sew Easy pierces the holes, there was no need to go and repierce them.
Using the needle provided and some embroidery thread from my stash I handstitched along the lines which I had pierced with the Sew Easy tool. I had created a lined grid between the punched scalloped circles.

 Below, is my layout with all the stitching complete. I like how it just adds a little more visual interest and texture to my layout.
To finish off my layout, I added my photos, some 2 Crafty Chipboard Heart Banners which were inked and spritzed with Glimmermist, and finished off with the remaining embroidery thread to tie the heart banners together.
 I hope you liked todays technique based step by step and give it a go. I think you will be seeing a bit more sewing my pages, as the Sew Easy makes it... well.... so easy to handstitch on my layouts.

Till next time, happy scrapping

Rach xo

Wednesday, February 15, 2012

Final whisper of Sweet Nothings....

Today's share comes to us from Sue with a fabulous heritage layout, with a great masculine feel to it.
To recreate this layout:
Green Tara Flowers Ivory 5cm & 7cm
Green Tara Roses Ivory
Birch Cluny Lace K07046 Natural
Martha Stewart Punch

Check back tomorrow for a step by step from Rachael using Lily Bee Head Over Heels Collection and the We R Memory Keepers Sew Easy Tool.


Tuesday, February 14, 2012

Kaisercraft these Days

Today we have received a beautiful new collection from Kaisercraft – These Days. Below are images of the lovely papers and embellishments which are now in stock. Below the images are also some cardstock matches that coordinate well with this collection.

P801 HistoryP796 Paper GenerationP797 AncestryP798 FamilyP799 TraditionP800 ReunionSS127 Sticker SheetPP863 Paper PadRB957 Rub OnsCT708 Collectables

Coordinating Cardstock

ASS 034 Vanilla Cardstock

ASS 035 Straw Cardstock

ASS 039 Clay Cardstock

ASS 040 Chocolate Cardstock

ASS 041 Chestnut Cardstock

ASS 042 Coffee Cardstock

ASS 043 Olive Cardstock