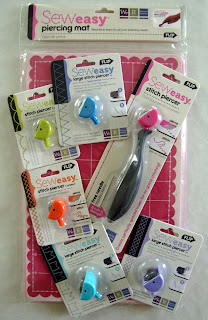
The
We R Memory Keepers Sew Easy has been on the market for a little while now, and WRMK have just kept on bringing out different interchangeable heads for this tool making it really versatile. For today's project however, I decided to use just the original head that comes with the main tool. The
WRMK Sew Easy also comes with a needle, which has its own nifty hiding hole, in the handle, so you never have to search for another needle. You can see it in the picture below.
To create the base of my layout, I used my Marvy Scalloped Circle punch, and randomly punched some circles from my Lily Head Over Heels patterned papers. I adhered these scalloped circles in a 3x3 Grid.
Using the
Sew Easy Mat, I layed my layout onto it and used the grid lines on the mat to guide where I would roll my sew easy tool. I can't believe how quick and easy the
Sew Easy Tool made piercing the holes ready to be handstitched. I just rolled the tool along my cardstock with only a small amount of pressure.
The picture below, shows how well the Sew Easy pierces the holes, there was no need to go and repierce them.
Using the needle provided and some embroidery thread from my stash I handstitched along the lines which I had pierced with the
Sew Easy tool. I had created a lined grid between the punched scalloped circles.
Below, is my layout with all the stitching complete. I like how it just adds a little more visual interest and texture to my layout.
To finish off my layout, I added my photos, some 2 Crafty Chipboard Heart Banners which were inked and spritzed with Glimmermist, and finished off with the remaining embroidery thread to tie the heart banners together.
I hope you liked todays technique based step by step and give it a go. I think you will be seeing a bit more sewing my pages, as the Sew Easy makes it... well.... so easy to handstitch on my layouts.
Till next time, happy scrapping
Rach xo


