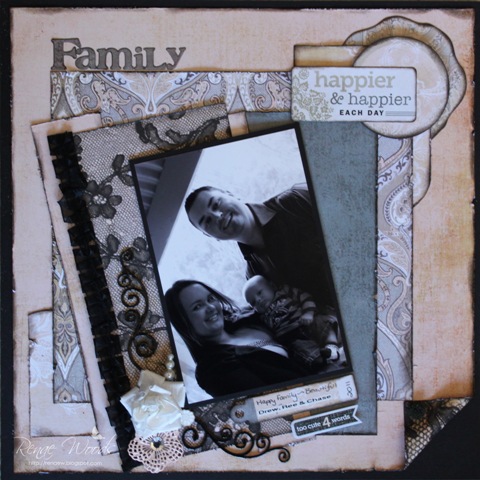
Not of the alcoholic kind though... a few more weeks until Christmas until we crack those Bubbles out!
I captured this lovely photo of my sister at a family friend's wedding. I was doing my best for the bubbles not to land on my satin dress and she was blowing them right at me lol! I love black and white photos and they work so well with the Basic Grey Little Black Dress range!
Here are a few close ups.... I wanted to remove some of the white starkness of the lace to blend in with the colour tones of the page, so I used my dauber and rubbed a little ink over it to give it a dirtier look.
I've made a distressed circle flower in the photo above, with tags from the Canvas Die Cut Flowers and Die Cut Shapes.
Head over to the Scraploot online store to pick up the following supplies to recreate this layout:
- BG Little Black Dress Die Cut Shapes
- BG Little Black Dress Canvas Die Cut Flowers
- BG Little Black Dress Alphabet Sticker Sheet
- BG Little Black Dress Eclectic Embellishments
- BG Little Black Dress Element Sticker Sheet
- BG Little Black Dress Metal Flowers
- BG Little Black Dress Title Stickers
- BG Little Black Dress Paper Drama Mod
- BG Little Black Dress Paper Haute Couture
- BG Little Black Dress Paper Tuxedo
- BG Little Black Dress Paper Etiquette
- American Crafts Memory Marker - Ash
- GT Organza Rosette Ivory
- GT Lace Off White L3042OW
- SI Magic Mount White
- XP 6mm Double Sided Tape
Don't forget to keep your eyes peeled for more inspiration from the Design Team during the week. Until next time, happy scrapping!
xx Renae
Monday, December 12, 2011
Friday, December 09, 2011
Trikin' - Michelle
They say that when you're on a good thing......stick to it.
So I am.
Not only am I continuing to showcase the fantastic Echo Park Time & Seasons Collection, but I am also hoping to show you, how to get the most out of a layout design (or sketch).
You might think you've seen this weeks layout before, and you'd be right....almost !
Using similar papers and the same layout design (but rotated horizontally), we have TRIKIN'.
By using different embellishments and slightly different placement, you can achieve another great layout, quickly and easily for your Friday night scrapping !
This week, I have used journal cards, tags, large stickers and large flowers for a totally different look !
On this occasion I've used the Echo Park Time & Seasons Alpha Stickers for the title, and once again I have made good use of the element stickers ! I have used a combination of black cardstock and Magic Mount to make the stickers stand out !
If you'd like to create this layout, you will need the following supplies, which are all available at the Scraploot Online Store.
Materials:
Echo Park Time & Seasons Collection
- Paper Fancy Free
- Paper Swanky Floral
- Element Stickers
- Alpha Stickers
- Journaling Cards
Kraft Cardstock
Black Textured Cardstock
Kaisercraft Paper Blooms - Olive
Bella Flowers Gentleman Symphony
May Arts Twisted Burlap - Olive
Magic Mount
XpressIt Double Sided Tape
Ink - Pinecone & Black
Thanks for stopping by, and your wonderful comments from last week.
I would love to see your layouts on our Facebook page !
Have a wonderful weekend, and Happy Scrapping !
Thursday, December 08, 2011
Nothing Like A Little Black Dress....
Today we are going to share with you a little extra inspiration from Sue for the collection Little Black Dress by Basic Grey. As you can tell this is a fave collection over here at the moment.....
To re-create this layout, you will need the following items which can be purchased over at Scraploot online.... for quick and easy access just click on each of the items below to take you directly to the store.
ASS 034 Vanilla Cardstock
ASS 075 Black Cardstock
Basic Grey Little Black Dress Papers
- Best Dressed
- Modern Vogue
- Foxy Posh
Embellished with
Little Black Dress Die Cut Shapes
Little Black Dress Canvas Die Cut Flowers
Little Black Dress Tissue Flowers
Little Black Dress Metal Flowers
Bella Vintage Harmony Flowers
Bella Black Boutique Flowers
Kaisercraft Paper Bloom Terracotta
2Crafty Vintage Iron Fence
Ink & Tools
Bella Distresser
Archival Ink - Sepia
Ranger Inkssentials Crackle Accents
With such a gorgeous cluster of embellishments, here is a close up, to show you in detail
We are hoping that you are loving what our new design team are sharing with you, and getting some inspiration. Be sure to pop back again tomorrow, to see what Michelle has in store for us.
Wednesday, December 07, 2011
DIY stamps: Ruby Bisson
Hey everyone! Here is my weekly post, with the focus on home-made stamps!
So often we make a page and suddenly realise- it would be totally awesome to have a '______' stamp! Well, I had that feeling whilst making this page and though 'well, why not?'. I grabbed some foam mounting tape and made my own!Simply draw on your design onto the foam:
Cut it out and peel back one side to adhere onto your stamping block:
Then using paint (because ink doesn't sufficiently grip to the paper-side of the foam) to stamp onto your layout! Here's this stamp in action using: Green Tara Mesh Burgandy, TA Glimmer Mist Christmas LED Red, MR Organza Roses Red and stickers from the SS Year-o-graphy Collection Kit.
The funny thing with this page is, is my glimmer mist EXPLODED onto this page, due to an experiment going wrong. I decided to work with it anyway. Hope you like! Ruby xx
Monday, December 05, 2011
Welcome to a new week!
Welcome to a new week and my Monday blog
post. Today I bring you a step by step layout. Before you start, you will need
to head over to the Scraploot online store to get all your goodies.
Here’s what you need:
Another shot of the chipboard flourish.
Here’s what you need:
- BG Little Black Dress Title Stickers
- BG Little Black Dress Element Sticker Sheet
- BG Little Black Dress Paper Best Dressed
- BG Little Black Dress Paper Drama Mod
- BG Little Black Dress Paper Tuxedo
- BG Little Black Dress Tissue Flowers
- Basic Grey Little Black Dress Eclectic Embellishments
- GT Organza Rosette Ivory
- 2C Corner Whispy Vines
- Vanilla Cardstock
- Ranger Distress Embossing Powder Black Soot
- Kaisercraft Pearls
- Green Tara Black Flowers
- Maya Road Trinket Pins Vintage Pearl
- SI Magic Mount White
- Pritt All Purpose Glue 40gm
- XP 6mm Double Sided Tape
And here is what I am going to show you how to create....
Here’s
what you need to do:
1. Using your vanilla cardstock, ink the edges. Using a second piece of
cardstock, cut a photo mat for your photo. Mat your 6” x 4” photo onto this
photo mat.
2. From the piece of “Tuxedo” paper, cut a 3” x 12” strip. Using the grey
side up, distress and ink. Place 1cm from the left hand edge of the cardstock.
3. Cut a 12” strip of the Green Tara Organza Rosette. Place 0.5cm from the
left hand edge of your grey “Tuxedo” paper.
4. From the piece of “Drama Mod” paper, cut a 9” x 7” rectangle. Using the
grey/cream flower side up, distress and ink. This piece will sit against the
right hand edge of your cardstock, centred from top to bottom.
5. From the piece of “Tuxedo” paper, cut a 4” x 1.5” strip. Using the grey
side up, distress and ink. Place this just under the bottom right edge of the
“Drama Mod” piece of paper.
6. From the piece of “Drama Mod” paper, cut a 8” x 2”. Using the cream side
up, distress and ink. This piece will sit against the right hand edge of your
cardstock, 1 cm down from the top of the “Drama Mod” flowered piece of paper.
7. From the piece of “Tuxedo” paper, cut a 2.5” x 3” strip. Place this over
the last piece of “Drama Mod” paper you placed down. It sits 1cm from the top
and 1cm from the right of the piece of paper.
8. From the Element Sticker Sheet, take the “I hope each and every day is
beautiful….” Sticker and place it above your paper that sits against the right
hand edge of the cardstock.
Take the “Happiness Is….” Sticker, ink the
edges and place in the top left corner of the cream “Drama Mod” piece of paper
from Step 6.
Take the “The best day ever” sticker, mount
with Magic Mount and place at the bottom right of your page, over the grey
“Tuxedo” paper from Step 5.
9. Take your photo and stick Magic Mount on the back of it. Place this just
off centre of your page. It sits 1” from the right hand edge of your cardstock
and 4” from the top.
10. Using your piece of chipboard, emboss with embossing powder. Adhere to the left bottom corner of your photo with Pritt Glue.
11. Using small black flowers, glue 4 randomly on your chipboard piece. Stick some Kaisercraft pearls in the middle of these small black flowers.
10. Using your piece of chipboard, emboss with embossing powder. Adhere to the left bottom corner of your photo with Pritt Glue.
11. Using small black flowers, glue 4 randomly on your chipboard piece. Stick some Kaisercraft pearls in the middle of these small black flowers.
12.
Using the Basic Grey tissue flower, stick the pin to the bottom of it.
I have peeled off the top 2 layers of the tissue paper as I didn't want it to sit as high. Place a medium black flower underneath the tissue paper flower, so the black
just peeks out from under the tissue paper. Stick this bundle in the bottom
corner of the chipboard flourish. Finish with the silver button from the
Eclectic Embellishments pack.
13.
Finish with 3 tiny Kaisercraft pearls on the grey piece of “Tuxedo” paper
(the one under the top right of your photo).
For a few of the finer points, here are a few close ups for you...
This is the corner of the flourish with the tissue paper flower.
Another shot of the chipboard flourish.
The sticker pack used in various locations and in different ways on the page.
I hope you have enjoyed this step by step guide. Don't forget to keep an eye out for more work from the DT this week.
Until next time, happy scrapping!
xx Renae
Labels:
2 Crafty,
Basic Grey Little Black Dress,
Design Team,
Green Tara,
Kaisercraft,
Maya Road,
Ranger,
Renae,
Scraploot
Friday, December 02, 2011
No.1 - Michelle
Hi Everyone !
Welcome to my first Scraploot blog post.
I hope you've had a wonderful week, but I've got to say TGIF !!!
From Monday - Wednesday I was in Canberra with 164 Year 5 & 6 students.
It was an excellent excursion, but being on duty 24/7 certainly takes it out of you...so I have decided to share with you a very simple, but classy layout that is easy to put together, at the end of a busy week !
Once again, I am showcasing the Echo Park - Time & Seasons Collection.
A close up of some of the stickers from the Echo Park - Time & Seasons Element Sticker Sheet. I have backed them with some black cardstock and Magic Mount to make them "pop"! If you'd like to recreate this layout, I've used the following materials - all of which are available in the Scraploot online store !
Materials:
Echo Park - Time & Seasons Collection
- Element Sticker Sheet
- Alpha Sticker Sheet
- Paper Fancy Free
- Paper Swanky Floral
Kraft Cardstock
Black Textured Cardstock
Green Tara Flowers - Rust
Bella Flowers Gentleman Symphony
Kaisercraft Pearls
X-press It Double Sided Tape
Pritt Glue
Magic Mount
Other: Ink, Dymo Labels
Thanks for stopping by...have an amazing weekend, scrapping or otherwise !
Michelle x
Welcome to my first Scraploot blog post.
I hope you've had a wonderful week, but I've got to say TGIF !!!
From Monday - Wednesday I was in Canberra with 164 Year 5 & 6 students.
It was an excellent excursion, but being on duty 24/7 certainly takes it out of you...so I have decided to share with you a very simple, but classy layout that is easy to put together, at the end of a busy week !
Once again, I am showcasing the Echo Park - Time & Seasons Collection.
No. 1 - Layout
As you can see, this layout only uses 1 x cardstock and 2 x pattern papers - very simple, very quick !
The photo is a standard 10x15cm of my No.2 son, but here he is on his No.1 (first) bike / trike. Hence the title - which I was able to achieve uniquely and quite easily, using the element sticker.
A close up of some of the other lovely products in my DT kit this month - beautiful Bella and Green Tara Flowers.
A close up of some of the stickers from the Echo Park - Time & Seasons Element Sticker Sheet. I have backed them with some black cardstock and Magic Mount to make them "pop"! If you'd like to recreate this layout, I've used the following materials - all of which are available in the Scraploot online store !
Materials:
Echo Park - Time & Seasons Collection
- Element Sticker Sheet
- Alpha Sticker Sheet
- Paper Fancy Free
- Paper Swanky Floral
Kraft Cardstock
Black Textured Cardstock
Green Tara Flowers - Rust
Bella Flowers Gentleman Symphony
Kaisercraft Pearls
X-press It Double Sided Tape
Pritt Glue
Magic Mount
Other: Ink, Dymo Labels
Thanks for stopping by...have an amazing weekend, scrapping or otherwise !
Michelle x
Labels:
Echo Park,
Michelle,
Scraploot,
Time and Seasons
Tuesday, November 29, 2011
DT Ruby: Mini Album!
Hi everyone!
It's Ruby here, how are we all?
I've come here today to share a project made with Simple Stories Yearography Collection Kit, found in the Scraploot store.
Last week I went away with 10 of my best friends down the coast, otherwise known as 'Schoolies'. We're the kind of group that spend more money on books than alcohol, curl up on lounges watching movies and making friendship bracelets instead of running a muck in town. Regardless, it was an incredible week, and I wanted to make sure I didn't miss a thing.
Before I left, I cut up the SS Year-o-graphy Paper Flashcards, SS Year-o-graphy Paper Photo Mat Elements and other papers and images from that line and made a small mini album, in which i could document quotes and daily activities.
I brought it along with me, and of course it was left outside in the rain, was stained with coffee and alcohol- but you know what? Who cares! Who says our art and our scrapbooking has to be 'perfect'? These accidents add character and depth to our pieces. Embrace it! Work with it!
So, here it is!

I also incorperated receipts and other euphoria from the week.
Head on over to the store to check out these great products! Such good quality, and such a wide variety of things you can do with them!
Ruby xo
It's Ruby here, how are we all?
I've come here today to share a project made with Simple Stories Yearography Collection Kit, found in the Scraploot store.
Last week I went away with 10 of my best friends down the coast, otherwise known as 'Schoolies'. We're the kind of group that spend more money on books than alcohol, curl up on lounges watching movies and making friendship bracelets instead of running a muck in town. Regardless, it was an incredible week, and I wanted to make sure I didn't miss a thing.
Before I left, I cut up the SS Year-o-graphy Paper Flashcards, SS Year-o-graphy Paper Photo Mat Elements and other papers and images from that line and made a small mini album, in which i could document quotes and daily activities.
I brought it along with me, and of course it was left outside in the rain, was stained with coffee and alcohol- but you know what? Who cares! Who says our art and our scrapbooking has to be 'perfect'? These accidents add character and depth to our pieces. Embrace it! Work with it!
So, here it is!
Other products used in this project include:Doodlebug Twine Swimming Pool - to tie the book together.
BellaFlowers Vintage Harmony, - to embellish.
Pritt Glue - best glue ever! Great to stick down materials and flowers.6mm XpressIt Double Sided Tape - for everything paper!Magic Mount - to add dimension to character.AmericanCrafts Memory Marker – Ash - I outlined almost everything with this pen. KaiserCraft, Paper Blooms Coconut - the great thing about these is, that the flowers are attached with wire! I poked some holes in the sides of a few pages and stitched it in to hold it there.
Head on over to the store to check out these great products! Such good quality, and such a wide variety of things you can do with them!
Ruby xo
Monday, November 28, 2011
A little bit of Basic Grey to start off the week...
Welcome to a new week and to my first post here on the Scraploot blog! I hope you all enjoyed the blog hop that was held over the weekend.
In my DT kit, I was extremely fortunate to have the new Basic Grey Little Black Dress papers! They are a gorgeous range and super fun to play with.
With this page, I have used some of the lighter backs to the papers and incorporated the greys and blacks from a few of the main papers to tie it all together. I have used die cuts that match the papers in the top and bottom corners to continue the design and it's another way to not have to use all your papers and build in coordinating accessories from the range.
I have used the journalling pen to trace around and highlight the alpha stickers.
I have clustered the flowers at the bottom corner of the photo and then added the flourishes. After inking the flourishes in black ink, I have added a thin coat of Glossy Accents.
The top corner features layering of the die cuts.
To create this layout at home, you will need the following products from the Scraploot online store (click on the links and they will take you right to the store!)
Thanks for checking out the first post from the DT for the week. Keep an eye out during the week for the rest of the DT's exciting projects.
Until next time, happy scrapping!
xx Renae
In my DT kit, I was extremely fortunate to have the new Basic Grey Little Black Dress papers! They are a gorgeous range and super fun to play with.
With this page, I have used some of the lighter backs to the papers and incorporated the greys and blacks from a few of the main papers to tie it all together. I have used die cuts that match the papers in the top and bottom corners to continue the design and it's another way to not have to use all your papers and build in coordinating accessories from the range.
I have used the journalling pen to trace around and highlight the alpha stickers.
I have clustered the flowers at the bottom corner of the photo and then added the flourishes. After inking the flourishes in black ink, I have added a thin coat of Glossy Accents.
The top corner features layering of the die cuts.
To create this layout at home, you will need the following products from the Scraploot online store (click on the links and they will take you right to the store!)
Maya
Road Trinket Pins Vintage Pearl
Ranger Inkssentials Glossy Accents
Black archival ink
Thanks for checking out the first post from the DT for the week. Keep an eye out during the week for the rest of the DT's exciting projects.
Until next time, happy scrapping!
xx Renae
Saturday, November 26, 2011
Drum Roll……
We are excited to announce and introduce you to our new Scraploot Design Team.
To celebrate this announcement of our new Scraploot Design Team, we are celebrating with a blog hop (all details at the end of the post), so that you can pop over to each of the girls blog and check them out... So without further ado, announcing;
With the new Design Team, you are going to find lots of inspiration popping up on the blog each week, with regular posts from each of the girls, store updates, along with regular step by step layouts or techniques.
Behind the scenes, here at Scraploot we are planning lots of FUN things, along with some great challenges.
So enough chattering… Here is a project created by Sue, using the latest collection from Bo Bunny – Enchanted.
To be a part of our blog hop and be in the running for some RAK, just drop by each of the DT blogs. When visiting each of the Design Teams blogs, look out for a letter within their post, in the colour RED. Once you have hopped by the four blogs and left some love on each, after collecting each of the RED letters, send an email to info@scraploot.com.au with the magic word, and your name, to be in the running for some goodies. All entries are to be received by Thursday, 1st December 2011 at 5pm.
Thanks for hopping by - now please hop on over to Renae’s blog, to get to know her a little better.
Just in case you get lost, here are the links in order for the Hop;
Renae
Ruby
Michelle
Rachael
To celebrate this announcement of our new Scraploot Design Team, we are celebrating with a blog hop (all details at the end of the post), so that you can pop over to each of the girls blog and check them out... So without further ado, announcing;
Renae Woods
Hi I'm Renae. I've been scrapping now for around 5 years. I live in Sydney with my gorgeous husband of almost 12 years, who features on many of my pages. I now also have a beautiful new nephew who is starting to creep into many of my pages! Fortunately family and friends know what an avid scrapper I am and how much I love my camera!
My camera is usually permanently attached to me at gatherings now so I can capture every moment!
I'm fortunate to have an amazingly creative outlet in scrapbooking and am just as fortunate to work in one of the beautiful parts of Sydney at Darling Harbour, where I am surrounded by the water and animals on a daily basis! After a crazy day at work, I love being able to retreat to my scrap area and create.
My scrapping style has changed over the years and I seem to have now settled on a blend of modern shabby chic. My work usually features plenty of distressing, inking and layering, not to mention flowers. I love my flowers!
I love scrapbooking and the wonderful friends I have met during my creative journey and I can't wait to meet plenty more!
Ruby Bisson
My name is Ruby Bisson and I am 17 years old and reside in sunny Sydney. I have been scrapbooking and lurking online chat rooms and challenge blogs since I was 13 and have been hooked on the craft ever since! I have just finished high school and am looking into becoming an English teacher in the future. I have an art studio on my driveway- a little caravan draped with material and lanterns, complete with electricity for the hot days. I have a messy, colourful style- and believe that honestly- you can never have TOO much paint or colour. ;)
Michelle Winston
I am 38 years old, married to Brett, with two gorgeous sons - Jacob 11yrs and Caden 3 yrs. We live on Sydney's beautiful Northern Beaches, and when I'm not scrapbooking, I am a primary school teacher !
I have been scrapbooking for a number of years now, and I still love it ! I think I like shopping for new goodies most of all LOL ! I have been fortunate to work for a variety of challenge blogs, websites, stores and manufacturers, and I have been lucky enough to have my work published as well. I was named a Scrapbooking Memories Master for 2010, and have really enjoyed my "masters" year, this year.
I am very happy to be on the Scraploot DT, and can't wait to share lots of scrapping, tutorials and inspiration with you !
And of course you know us:
Rachael
Sue
We would like to welcome Renae, Ruby and Michelle to the Scraploot Design Team. We are very excited to have them on board and can’t wait for these girls to start inspiring us week after week. We are sure you are going to love seeing what they come up with. With the new Design Team, you are going to find lots of inspiration popping up on the blog each week, with regular posts from each of the girls, store updates, along with regular step by step layouts or techniques.
Behind the scenes, here at Scraploot we are planning lots of FUN things, along with some great challenges.
So enough chattering… Here is a project created by Sue, using the latest collection from Bo Bunny – Enchanted.
Materials Used
-Cut Outs – Rose – Enchanted
To be a part of our blog hop and be in the running for some RAK, just drop by each of the DT blogs. When visiting each of the Design Teams blogs, look out for a letter within their post, in the colour RED. Once you have hopped by the four blogs and left some love on each, after collecting each of the RED letters, send an email to info@scraploot.com.au with the magic word, and your name, to be in the running for some goodies. All entries are to be received by Thursday, 1st December 2011 at 5pm.
Thanks for hopping by - now please hop on over to Renae’s blog, to get to know her a little better.
Just in case you get lost, here are the links in order for the Hop;
Renae
Ruby
Michelle
Rachael
Labels:
2 Crafty,
Basic Grey,
Basic Grey Little Black Dress,
Bo Bunny,
Bo Bunny Enchanted,
Design Team,
Sue
Wednesday, November 23, 2011
Announcement Coming Soon
We are getting excited here at Scraploot, as we work behind the scenes with our amazingly talented new design team. Be sure to pop by on Saturday after 9am for the big reveal. To celebrate their will be a Blog Hop, with something to inspire everyone along the way. So let the countdown begin, only 3 more sleeps.
Subscribe to:
Posts (Atom)